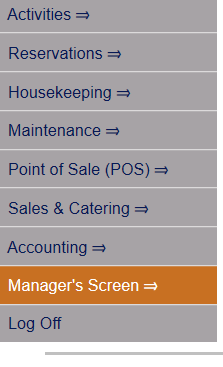
Select Managers Screen from the Quick Menu on the left side of the screen, then select Configuration > Activities > Attendants.
Select Manager's Screen to be taken to the MANAGER'S COMMANDS screen.
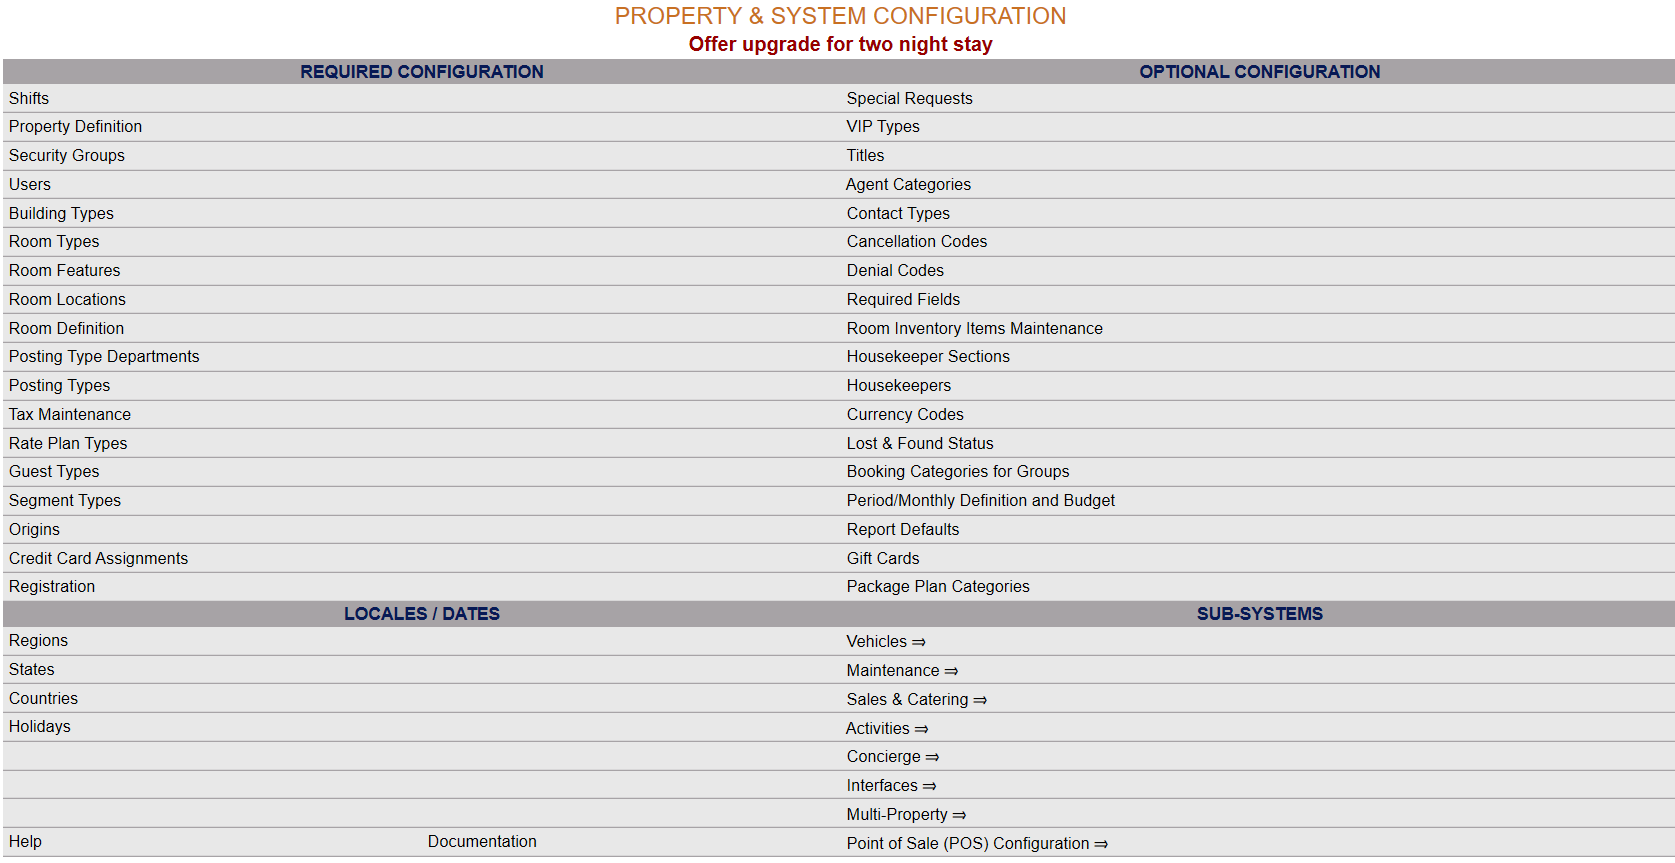
Select Configuration to be taken to the PROPERTY AND SYSTEM CONFIGURATION screen.
Alternately, you may also be able to select Configuration directly from the Quick Menu, if the menu has been set up to include the Configuration option.
This will take you to The Property System Configuration Menu.
The list of property configuration options are divided into four sections, which are Required Configuration, Optional Configuration, Locales/Dates and Sub-Systems.
Select Activities => from the Sub-Systems section.
This will open the Activities Configuration Menu.
The Activities Configuration Menu has two sections, Activities List 1 and Activities List 2.
Select Attendants from the Activities List 1 section.
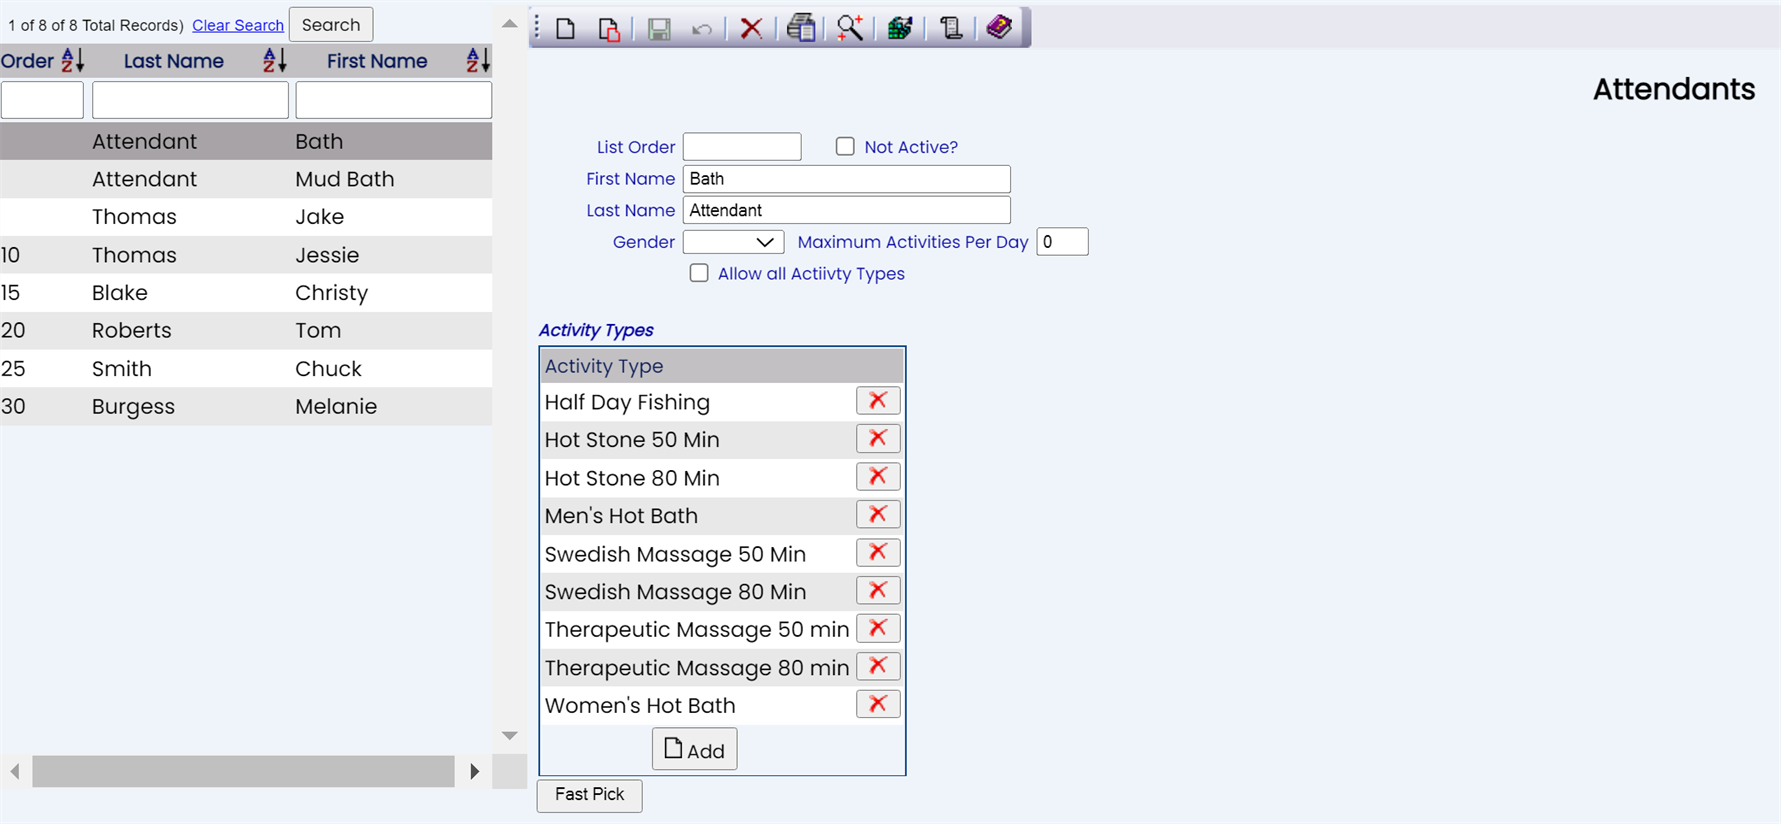
When opened, the Attendants screen display is split into two frames, with the left side of the screen listing any already configured attendants for the Property and the right side containing the fields you need to complete in order to add or edit an Attendant for your Property. Any changes made on the right, once saved, will be updated in the listings to the left.
The currently configured attendants are displayed by:
Order: List Order of the attendants . If there is no list order number, the attendants will be displayed alphabetically.
Last Name: The last name of the attendant.
First Name: The first name of the attendant.
Selecting any attendant on the left will display the details on the right.
Your options include the following:
Generate a new entry:
Click the New ![]() button from the toolbar to add a new attendant.
button from the toolbar to add a new attendant.
Complete the fields described below.
OR:
Select an existing attendant from the list on the left, and click the Replicate ![]() button from the toolbar. Then change the field information as described below.
button from the toolbar. Then change the field information as described below.
Edit the current selection:
Change the field information described below.
List Order: Enter the desired List Order for this attendant. If there is no list order number, the attendant will be displayed alphabetically.
This field is optional.
Not Active: This box may be checked or unchecked. If this attendant is no longer available for any reason, check this box to remove them from your scheduling possibilities.
First Name: This is the first name of the attendant. Enter the name in manually.
Last Name: This is the last name of the attendant. Enter the name in manually.
Note: While this field is not required to enter an attendant into Skyware Systems, attendants entered in Skyware Systems MUST HAVE the last name field completed to be shown as available for activity scheduling purposes.
Gender: This is a drop-down menu, select one or leave blank.
Maximum Activities Per Day: Enter the maximum number of activities this attendant may be scheduled for in a day. By default it is set at 0.
Allow all Activity Types: This box may be checked or unchecked. If this attendant is capable of performing ALL your possible activity types, you can check this box. Otherwise, you will need to complete the Activity Types section below, to list any activities that this attendant is qualified to perform.
Note: To add Activity Types for an attendant you MUST first save the attendant into the system; until the attendant has been saved the Activity Types section will not be accessible.
Activity Types: This section will contain the list of any activities that your Property offers that you have selected this attendant as being able to perform.
To add an activity you have two options:
Click the gray button Add to open the Activity Types for "Attendant Name" screen.
The Activity Types screen is split into two frames, with the left side of the screen listing any already added activities for the attendant and the right side containing the Activity Type field, which is a drop-down menu of all activities available to add.
Use the drop-down menu of available options to select an activity to add. Once you have selected one, click the save button in the local tool bar. This will add the selection to those listed on the left, and display the name of the activity you have just added on the right.
If you are finished, you can now return to the Attendants screen by clicking the Attendants button in the local tool bar.
If you wish to add more activities to this attendant, you can use the New ![]() or Replicate
or Replicate ![]() icons in the local tool bar which have now become available. (These two icons are NOT available for use when you first enter the screen from the Attendant screen via the Add button).
icons in the local tool bar which have now become available. (These two icons are NOT available for use when you first enter the screen from the Attendant screen via the Add button).
Click either the New or Replicate button from the toolbar to add a new activity.
This will remove the activity chosen from the Activity Type field, returning the drop-down menu of all activities available to add.
Now to add another activity, as before, simply select the next activity from those available in the Activity Type drop-down menu field, and click the save button.
Again, this will add the selection to those listed on the left, and display the name of the activity you have just added on the right.
Repeat until you have added the activities desired.
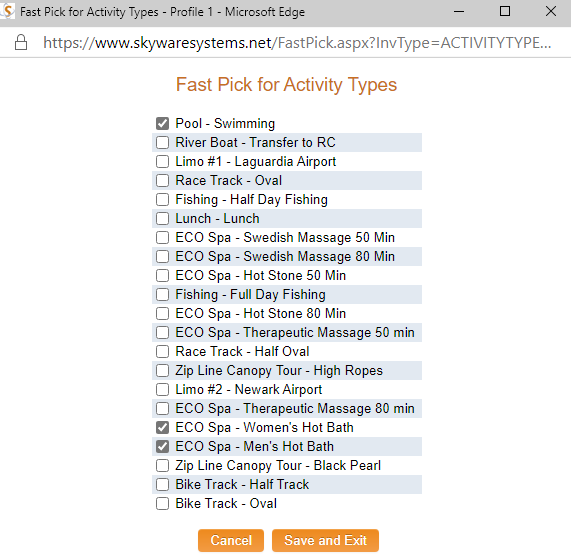
Click the gray button Fast Pick to open a pop-up window listing all the activities available to add as fast-pick options.
Check ALL activities you wish to have associated with the specific attendant, then click the orange button Save and Exit to return to the Attendants screen.
Once you have added any activity options that you wish the attendant to be associated with, they will be displayed in the Activity Type section.
Note: The Fast Pick button allows you to add several activities at once.
Note: Any Activity Type shown in this section will have a delete button on its right, enabling you to remove that activity type easily from those associated with the attendant.
Clicking on the delete button will cause a pop-up window from Skyware Systems to appear, asking if you really wish to delete the record.
Click the blue button OK, and the activity will be removed from the list.


